Accessibility in mycourselink
Brightspace offers tools for instructors to design accessible courses that meet WCAG/AODA standards. Creating accessible courses requires careful design strategies. These strategies include organizing content effectively, breaking information into manageable topics, creating accessible documents, adding alt text to images, captioning videos, and applying Universal Design for Learning (UDL) principles.
Below is a list of tools in Brightspace that can assist instructors in creating a more accessible and inclusive course experience for all learners. Please note that these tools are specifically for content created within Brightspace. Resources created on other platforms or uploaded from external sources need to be reviewed for accessibility.
HTML Editor
The HTML Editor in Brightspace is the default editor used in tools wherever content is created, such as in content pages, announcements, quizzes, discussions, grading feedback, etc.
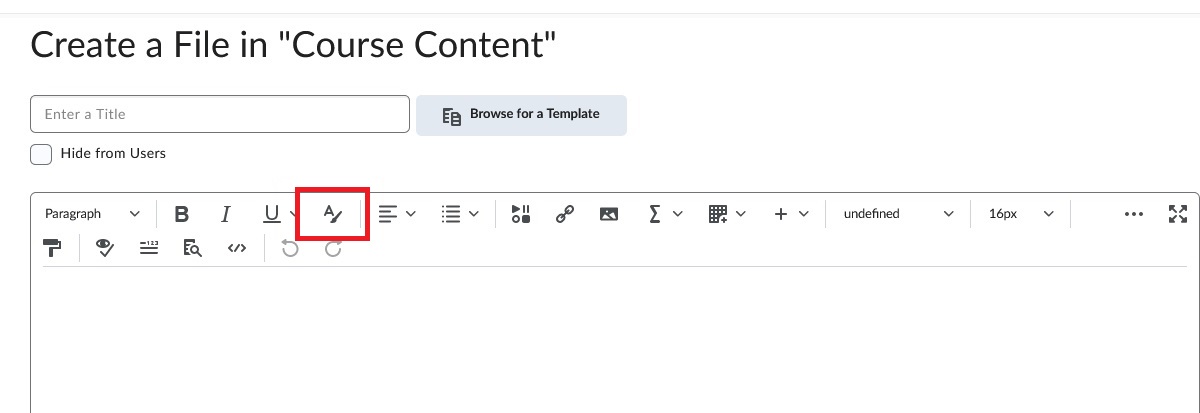
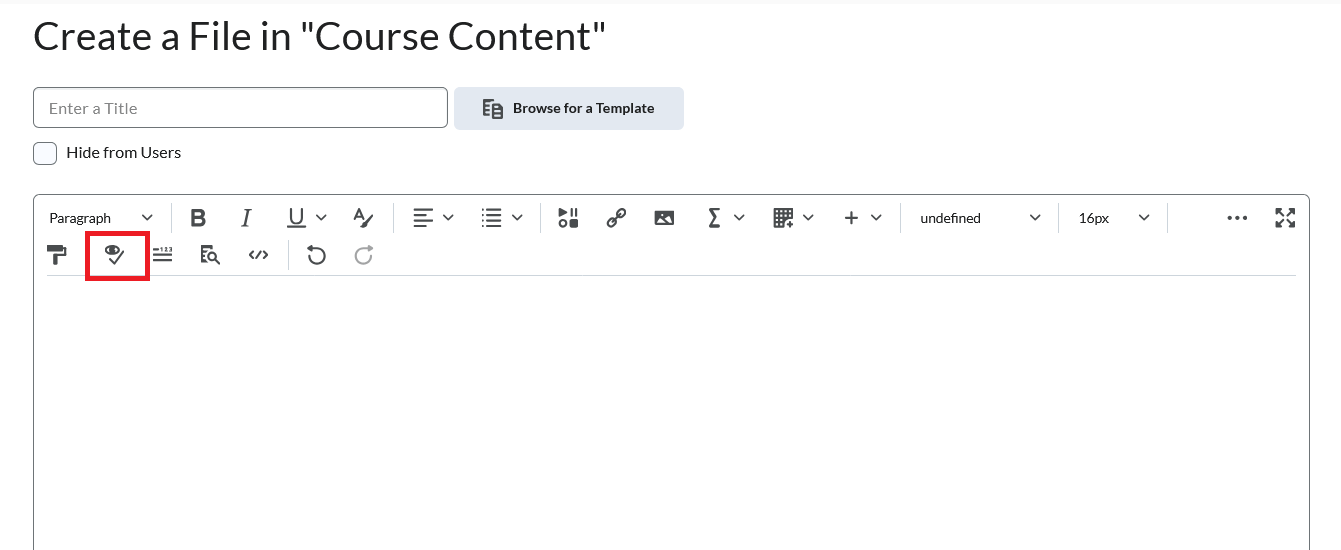
The built-in accessibility features of the editor make it easy to add heading levels to content, check colour contrast, test for accessibility issues, and add alternative text to images.
| Adding Heading Levels to Content |
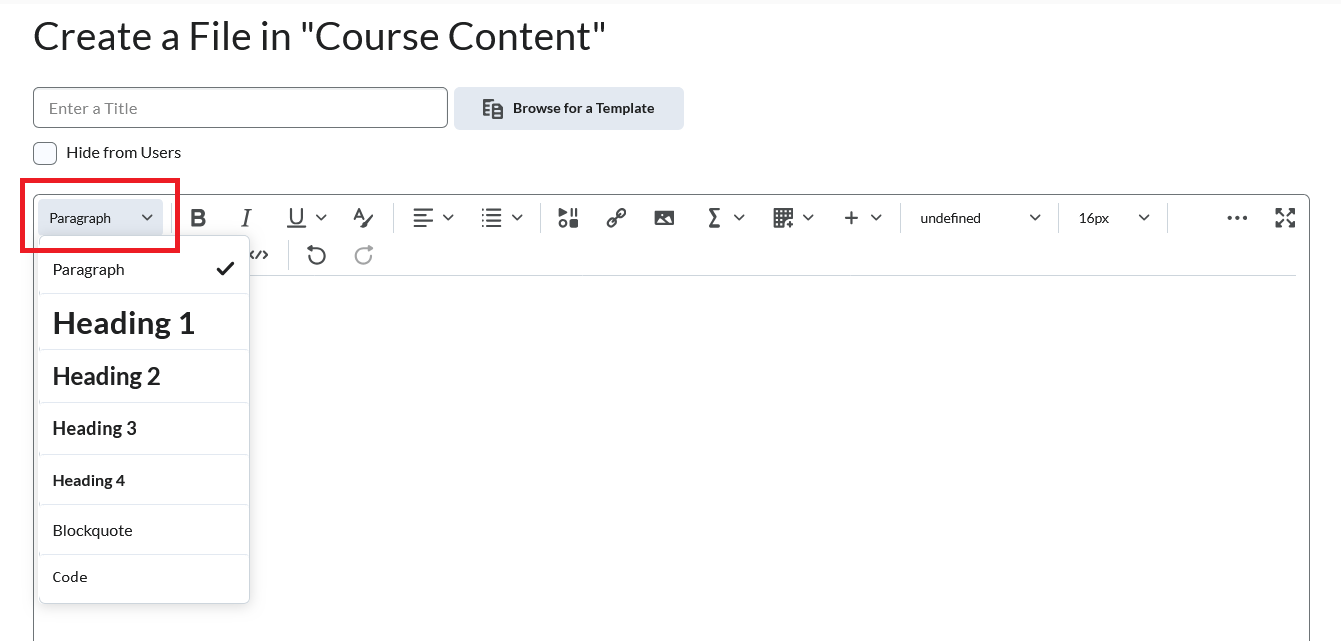
Headings organize content in a hierarchical order, with [H1] being the highest rank or first level. Subsequent headings would follow in decreasing order [H2], [H3], etc. based on the flow of the content., Correctly formatting documents with headings supports readability, allows easier scanning and skim reading by conveying levels of importance and key concepts, and ensures that pages can be read with assistive technologies and plug-ins. Adding Headings to New Content Files:
Adding Headings to Existing Content Files:
|
| Checking Colour Contrast |
| Adequate colour contrast ratio between text and background plays a crucial role in making digital materials accessible to all learners. This contrast ratio ensures that the text is easily distinguishable from its background, improving readability and comprehension. For instance, dark text on a light background or vice versa creates a higher contrast ratio, making the text more visible. The built-in contrast checker in the HTML editor is a valuable tool that assists instructors in adhering to accessibility standards for visual accessibility. This checker evaluates the colour contrast between text and background elements, flagging any instances where the contrast ratio falls below the recommended WCAG ratings.
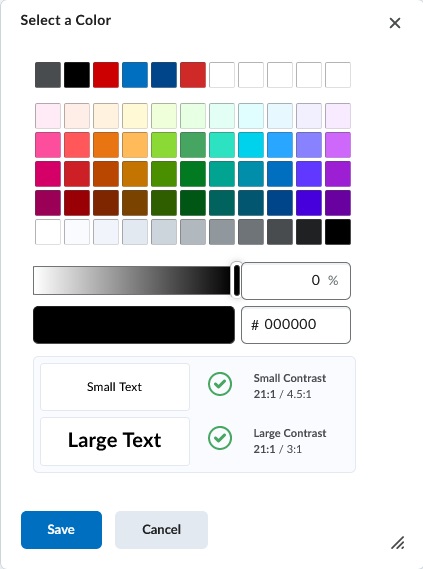
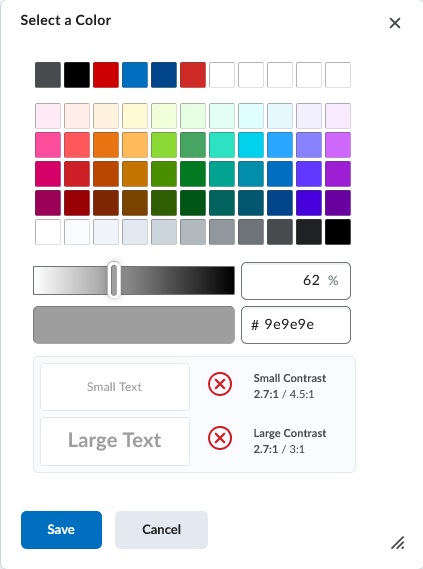
Green checkmarks indicate font colours have the correct contrast and are accessible whereas a font colour with a red X indicates an insufficient contrast. The slider on the checker can be used to adjust the contrast to verify the font colour passes the WCAG standards. Correct colour contrast verified by the green checkmarks.
Insufficient contrast noted by the red X's.
|
| Testing for Accessibility Issues |
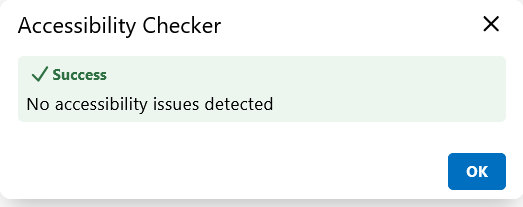
The HTML editor's built-in Accessibility Checker scans and highlights text for common accessibility issues and remediation. This includes colour contrast, missing alt text for images, missing captions for tables, and incorrect or missing heading levels. The checker guides the user through steps to resolve these accessibility issues.
Content with no accessibility issues.
Content with accessibility errors.
|
| Adding Alternative Text to Images |
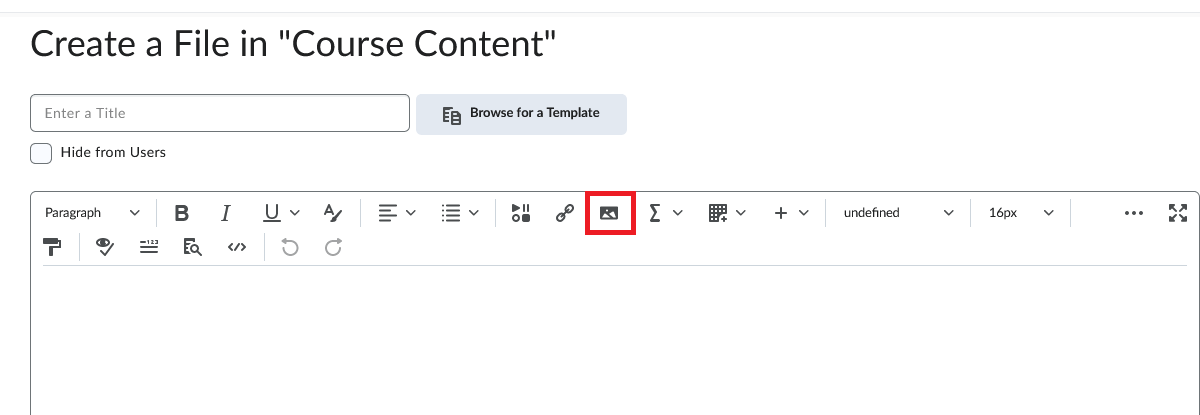
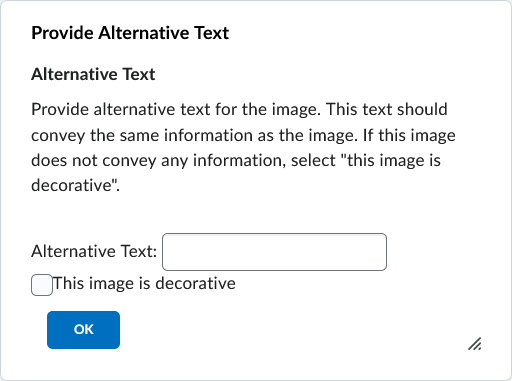
Alternative text is used to describe non-textual information such as images and multimedia on content pages. This enables technologies like screen readers to audibly present a description of the non-textual content. The description should explain the purpose of its connection to the content, not just describe the image contents. When uploading non-textual content through the Insert Image tool, a pop-up window appears to enter a description of the content. If the image is purely decorative and has no function, an option to mark the content as such is available. WC3 Tips and Tricks for creating good alternative text descriptions.
|
| Video Note |
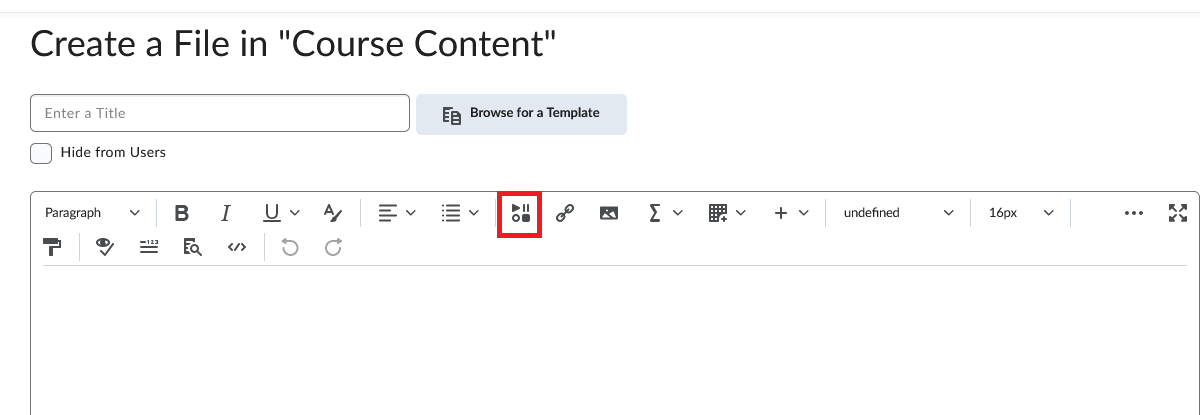
Video Note is the built-in video recorder in Brightspace, allowing instructors to create and add captioned video files of 30 minutes or less to their courses. These notes can also be reused in other courses taught by an instructor. Search the Media Library for previously created video notes. Videos created in other applications can also be uploaded through Video Note. The Video Note tool can be accessed through the Insert Stuff icon on the HTML editor navigation bar.
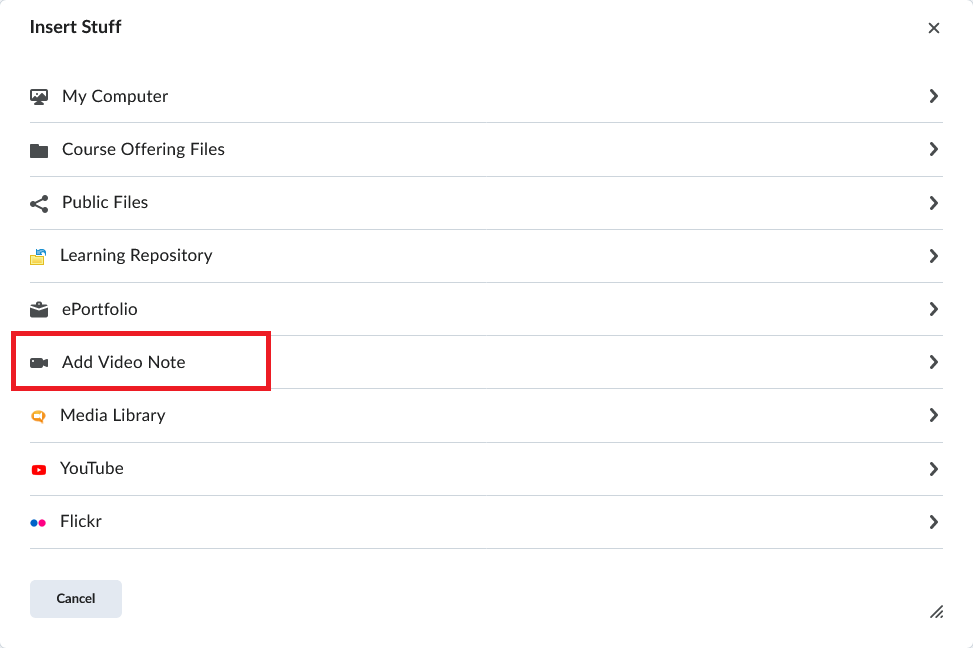
Select Add Video Note from the list and check the permission to allow mycourselink to access your computer’s camera and microphone.
Click the "New Recording" button to start recording. The timer will track the length of the video. To record only audio, toggle the "Audio Only" option.
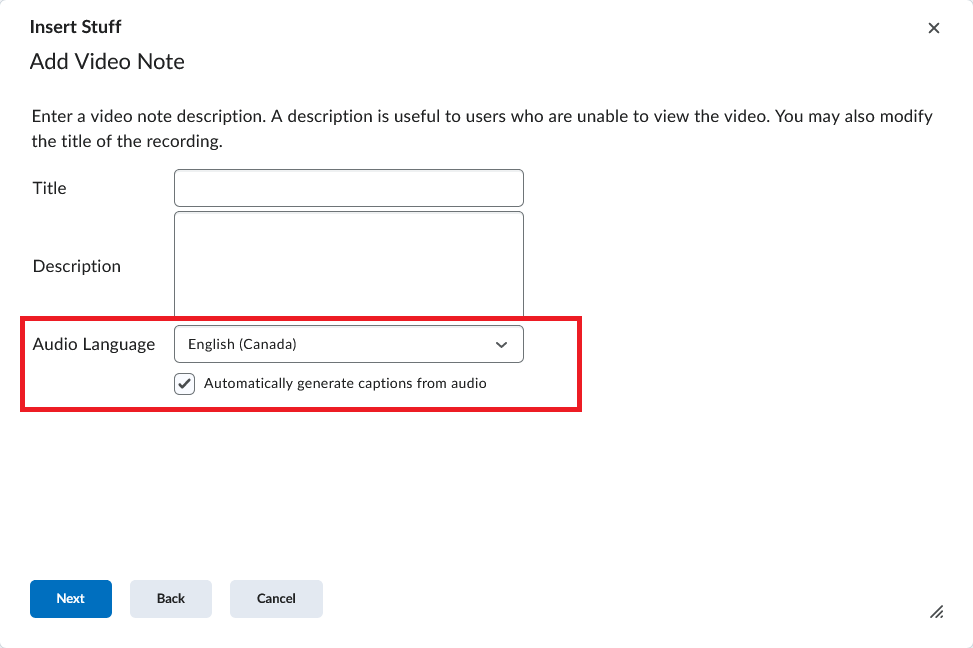
To generate captions for the video automatically, choose an Audio Language from the drop-down menu and check the "Automatically generate captions from audio" box. Click the Next button to start processing the video. Once it's done, you can preview the video and add it to a course.
|
Flexible Due Dates and Time Extensions
Tools that support timed assessments or those with due dates include features that enable instructors to easily set flexible options for students who need academic accommodations.
The "Special Access" feature in the Availability Dates and Conditions section of the Assignment and Quizzes Tools enables instructors to easily apply individualized due dates or time extensions for specific students or groups of students.
Refer to the mycourselink Assignments and mycourselink Quizzes & Surveys sections on this website for full details about each of these tools and their accessibility features.
Additional Resources
Lakehead University’s Student Accessibility Services: Resources for Faculty and Staff
Ontario’s Universities Accessible Campus: Educator’s Accessibility Toolkit
eCampusOntario’s Digital Accessibility
Accessibility Standards at D2L


